60-day returns • free shipping on USA orders $129+
Handicrafts Made Simple Tips and Ideas
Welcome to the Handicrafts Made Simple page for more great tips and ideas. The bonus material given here is related to our Handicrafts Made Simple DVD series. Each DVD features a different handicraft, teaching how to do the craft while showing you how to create usable and enjoyable projects. You’ll find additional projects and ideas on this page. Many of the projects included on these handicraft videos (such as hats, scarves, baby blankets, and wooden toy cars) can be donated to a ministry like Samaritan’s Purse: Operation Christmas Child, local hospital services, homeless shelters and rescue missions, crisis pregnancy centers, or other charities of your choice. Check back often for more bonus material as we add more handicrafts to the series.
Cardboard and Paper
Photo Envelopes: Fussy Cutting
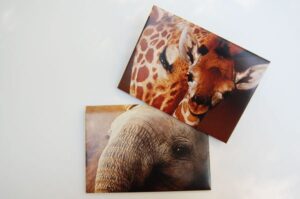
When you’re making envelopes from old calendar pages, or something with a picture on it, it’s fun to plan out where you’ll cut the envelope for best effect.
For instance, if you have a calendar page with a giraffe’s head on it, you might want to ensure that the head winds up on the front of the envelope and not tucked down under one of the flaps. Or worse still, upside down.
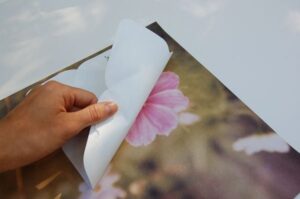
The key to positioning the photo is a technique sometimes called “Fussy Cutting.” When you look at your envelope template, you’ll see one large rectangle or square, surrounded by triangles or smaller rectangles. That large piece right there in the center is where you want to put your selected piece of photo.
Mark the envelope top flap so you know which side is up, then arrange your envelope (peeking underneath as needed) so the large center rectangle or square lays right over the portion of the paper you want to feature on the front of your envelope.
Trace around the envelope, cut it out, and there you have it! A lovely, centered and right-side-up photo envelope.
Tip: As I mention on the DVD, you might want to put the address, stamp, and return address labels on the back of the envelope once you’re ready to mail it. That is perfectly acceptable, and keeps the pretty front from being covered up.
Crochet
Bonus Slippers Pattern
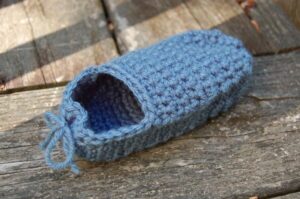
Once you are comfortable crocheting the projects on the DVD, you may want to try your hand at crocheting these Simplicity Slippers. Download this free pattern; it includes both adult size and child size.
Hand Sewing
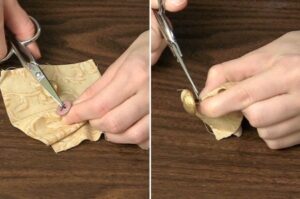
Session Five explains how to sew on buttons but I didn’t explain how to remove buttons. It’s easy. Simply use small scissors to clip the thread on top of the button, or pull the fabric away from the button and cut the thread underneath. Be careful not to cut the fabric by keeping it out of the way and by only cutting near the button side of the thread.
Woodworking
Session Two demonstrates how to make a toy car. Once you’re comfortable with the steps involved, you may want to trying making other types of vehicles. Download these free patterns for a toy sports car and a toy truck.


